- Multi Purpose Themes
- E-Commerce Themes
- Education Themes
- News Themes
- Business & Consulting
- SEO Themes
- Directory & Listing
- Travel & Booking
- Digital Marketing
- Automobile Themes
- Medicine & Healthcare
- Hotel Theme
- Blog Themes
- ThemeGrill Themes
- Appointment & Booking
- Classified Ads Theme
- Fitness & Gym Themes
- Interior Designing
- Job Themes
- Legal & Law Firm
- Real Estate Theme
- Cryptocurrency
- Podcasting Theme
- Portfolio Theme
Sale

17
People watching this product now!
Tutor Pro Razorpay Addon GPL v1.0.0
Original price was: 72.52$.3.32$Current price is: 3.32$.variations_header_title_color"":[""""]
Tutor Pro Razorpay Addon GPL – Tutor LMS supports integration with Razorpay, a leading payment gateway that offers secure and efficient payment processing for online transactions. Razorpay allows you to accept payments through multiple methods, including credit cards, UPI, net banking, and wallets.
- Use on Unlimited Website – Personal or Clients
- Original Product From the Developer
- Quick help through Email & Support Tickets
- Get Regular Updates For 1 Year
- Last Updated –
- Developer Live Preview
- Get this Product for Free in All Memberships
Description
Tutor Pro Razorpay Addon GPL Overview
Tutor LMS supports integration with Razorpay, a leading payment gateway that offers secure and efficient payment processing for online transactions. Razorpay allows you to accept payments through multiple methods, including credit cards, UPI, net banking, and wallets.
Ensure Razorpay supports your currency and is available in your region before proceeding.
Adding Razorpay as a Payment Option
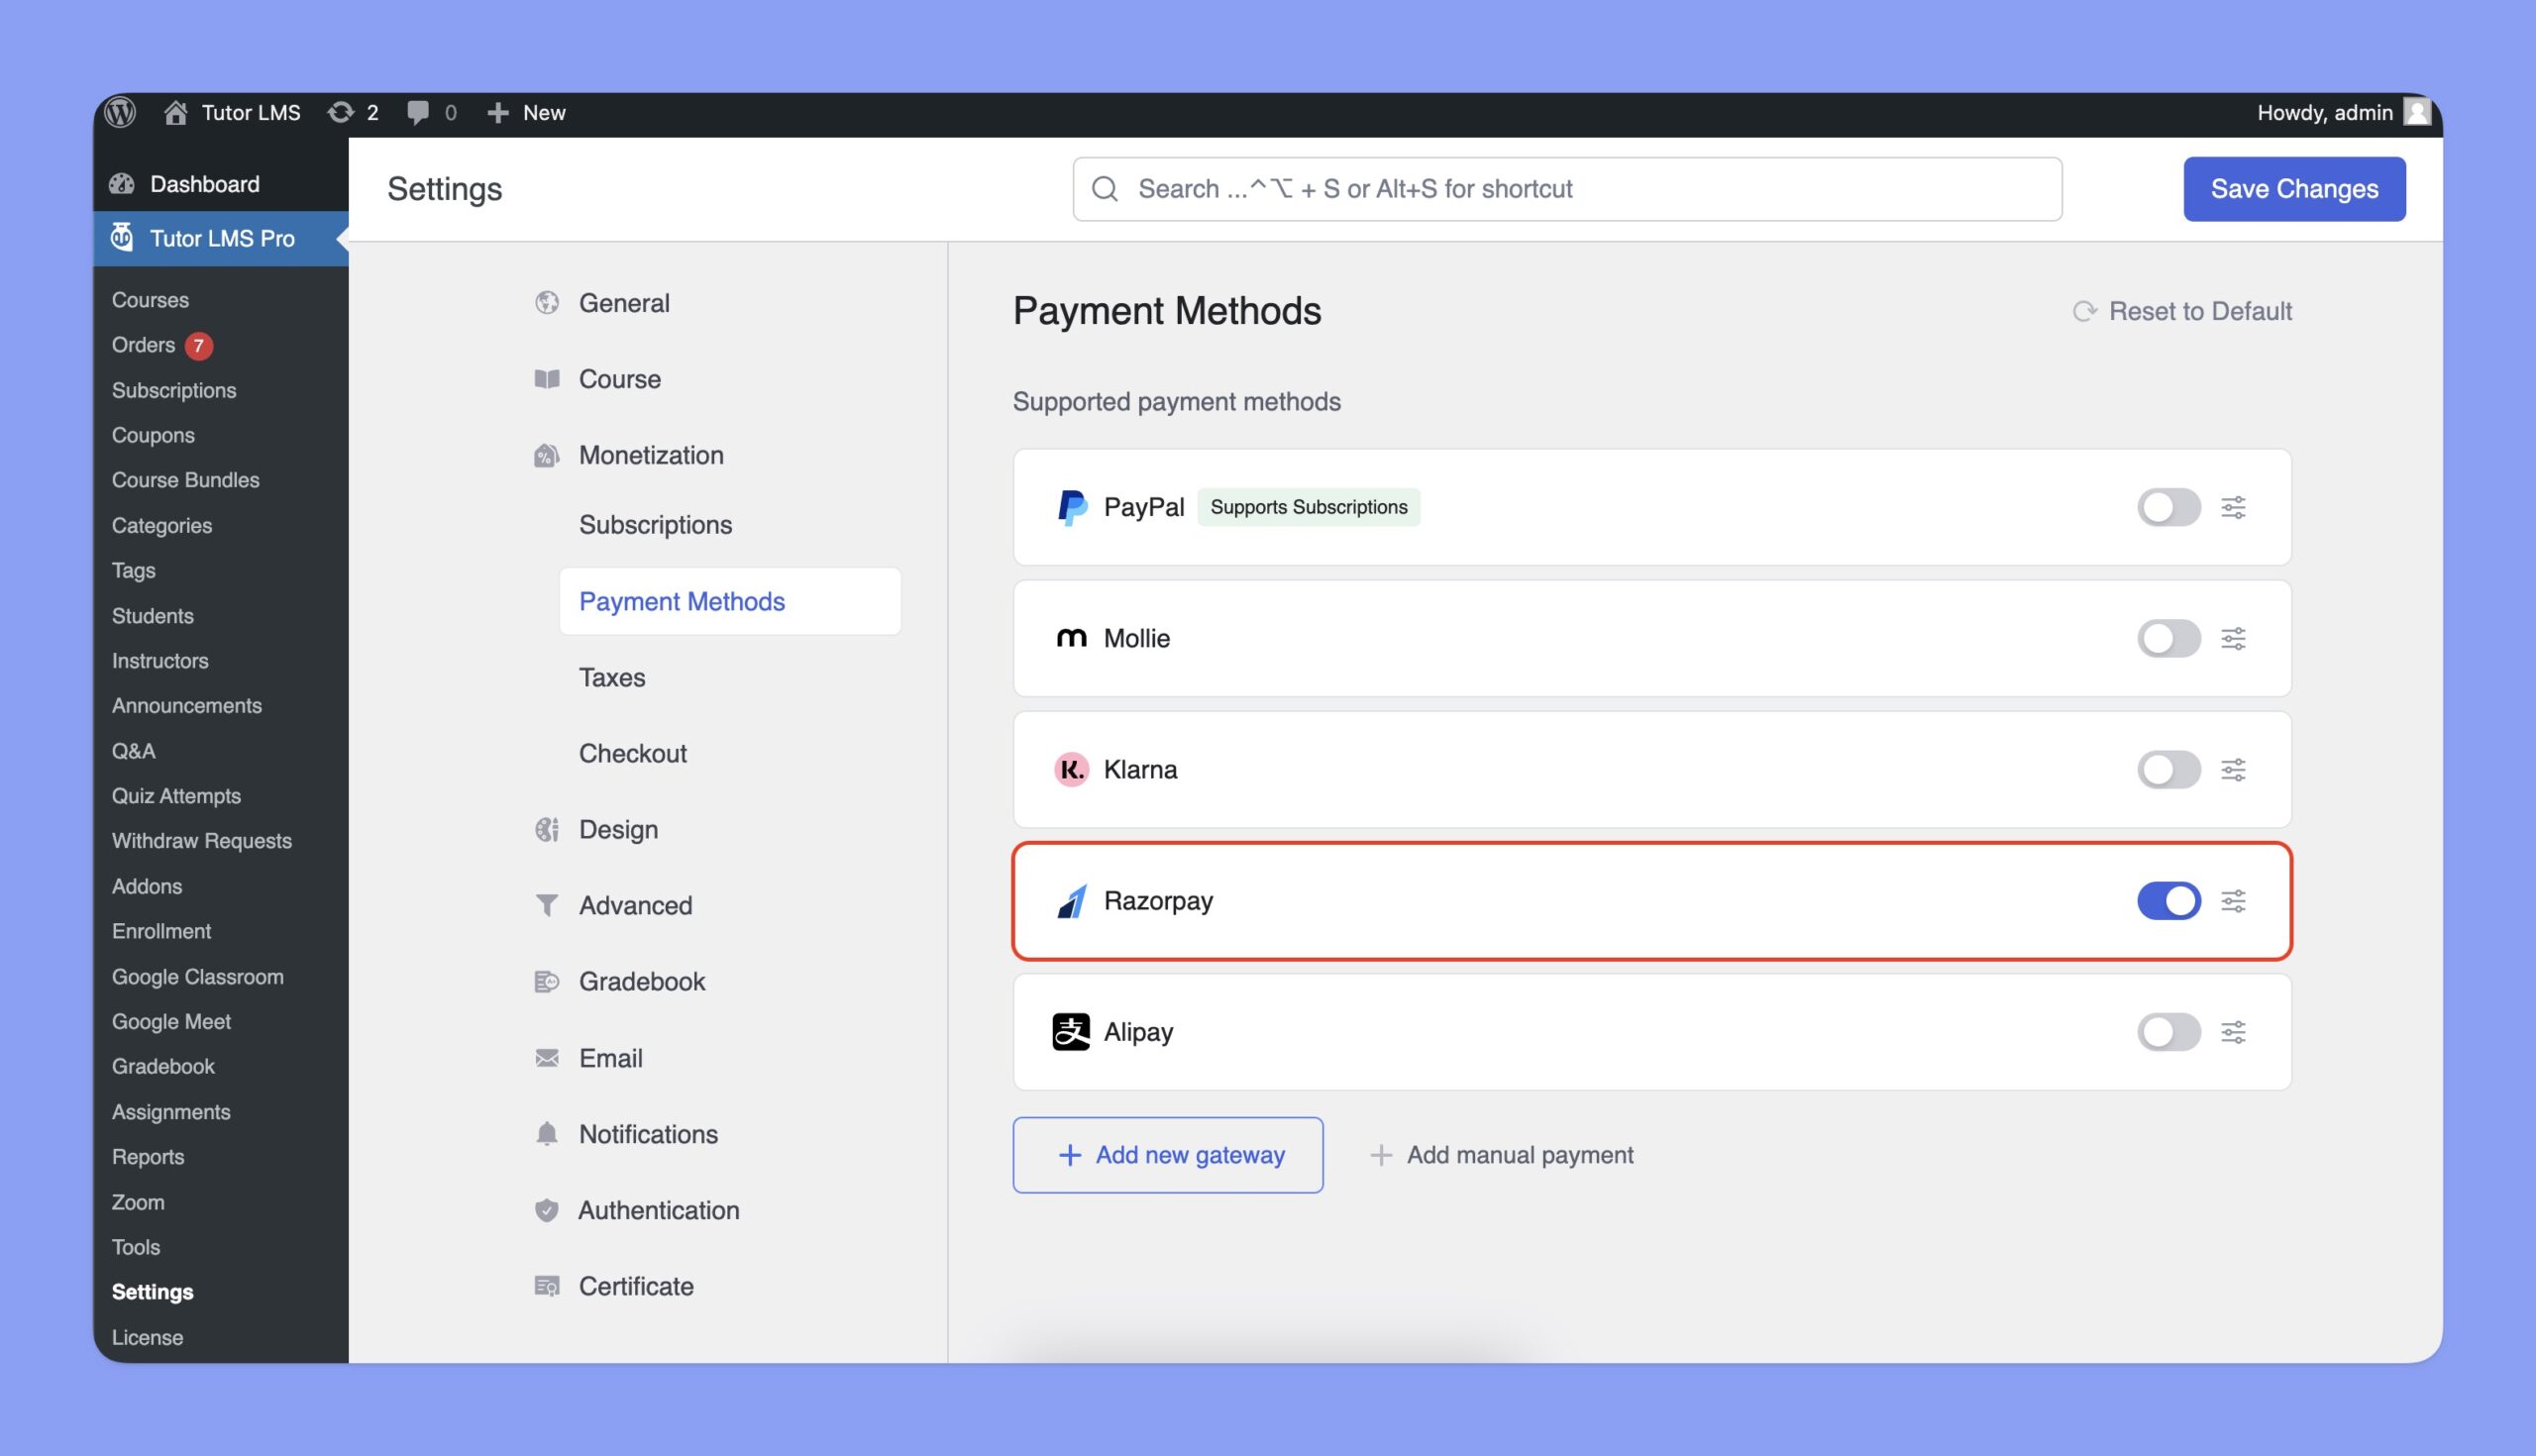
Access the Payment Methods:
- Log in to your Tutor LMS Dashboard.
- Navigate to Settings > Monetization > Payment Methods.
Add Razorpay:
- Click the Add new gateway button.
- From the list of available payment methods, select Razorpay and click the Install button.
- Once installed, Razorpay will appear as one of your payment options.
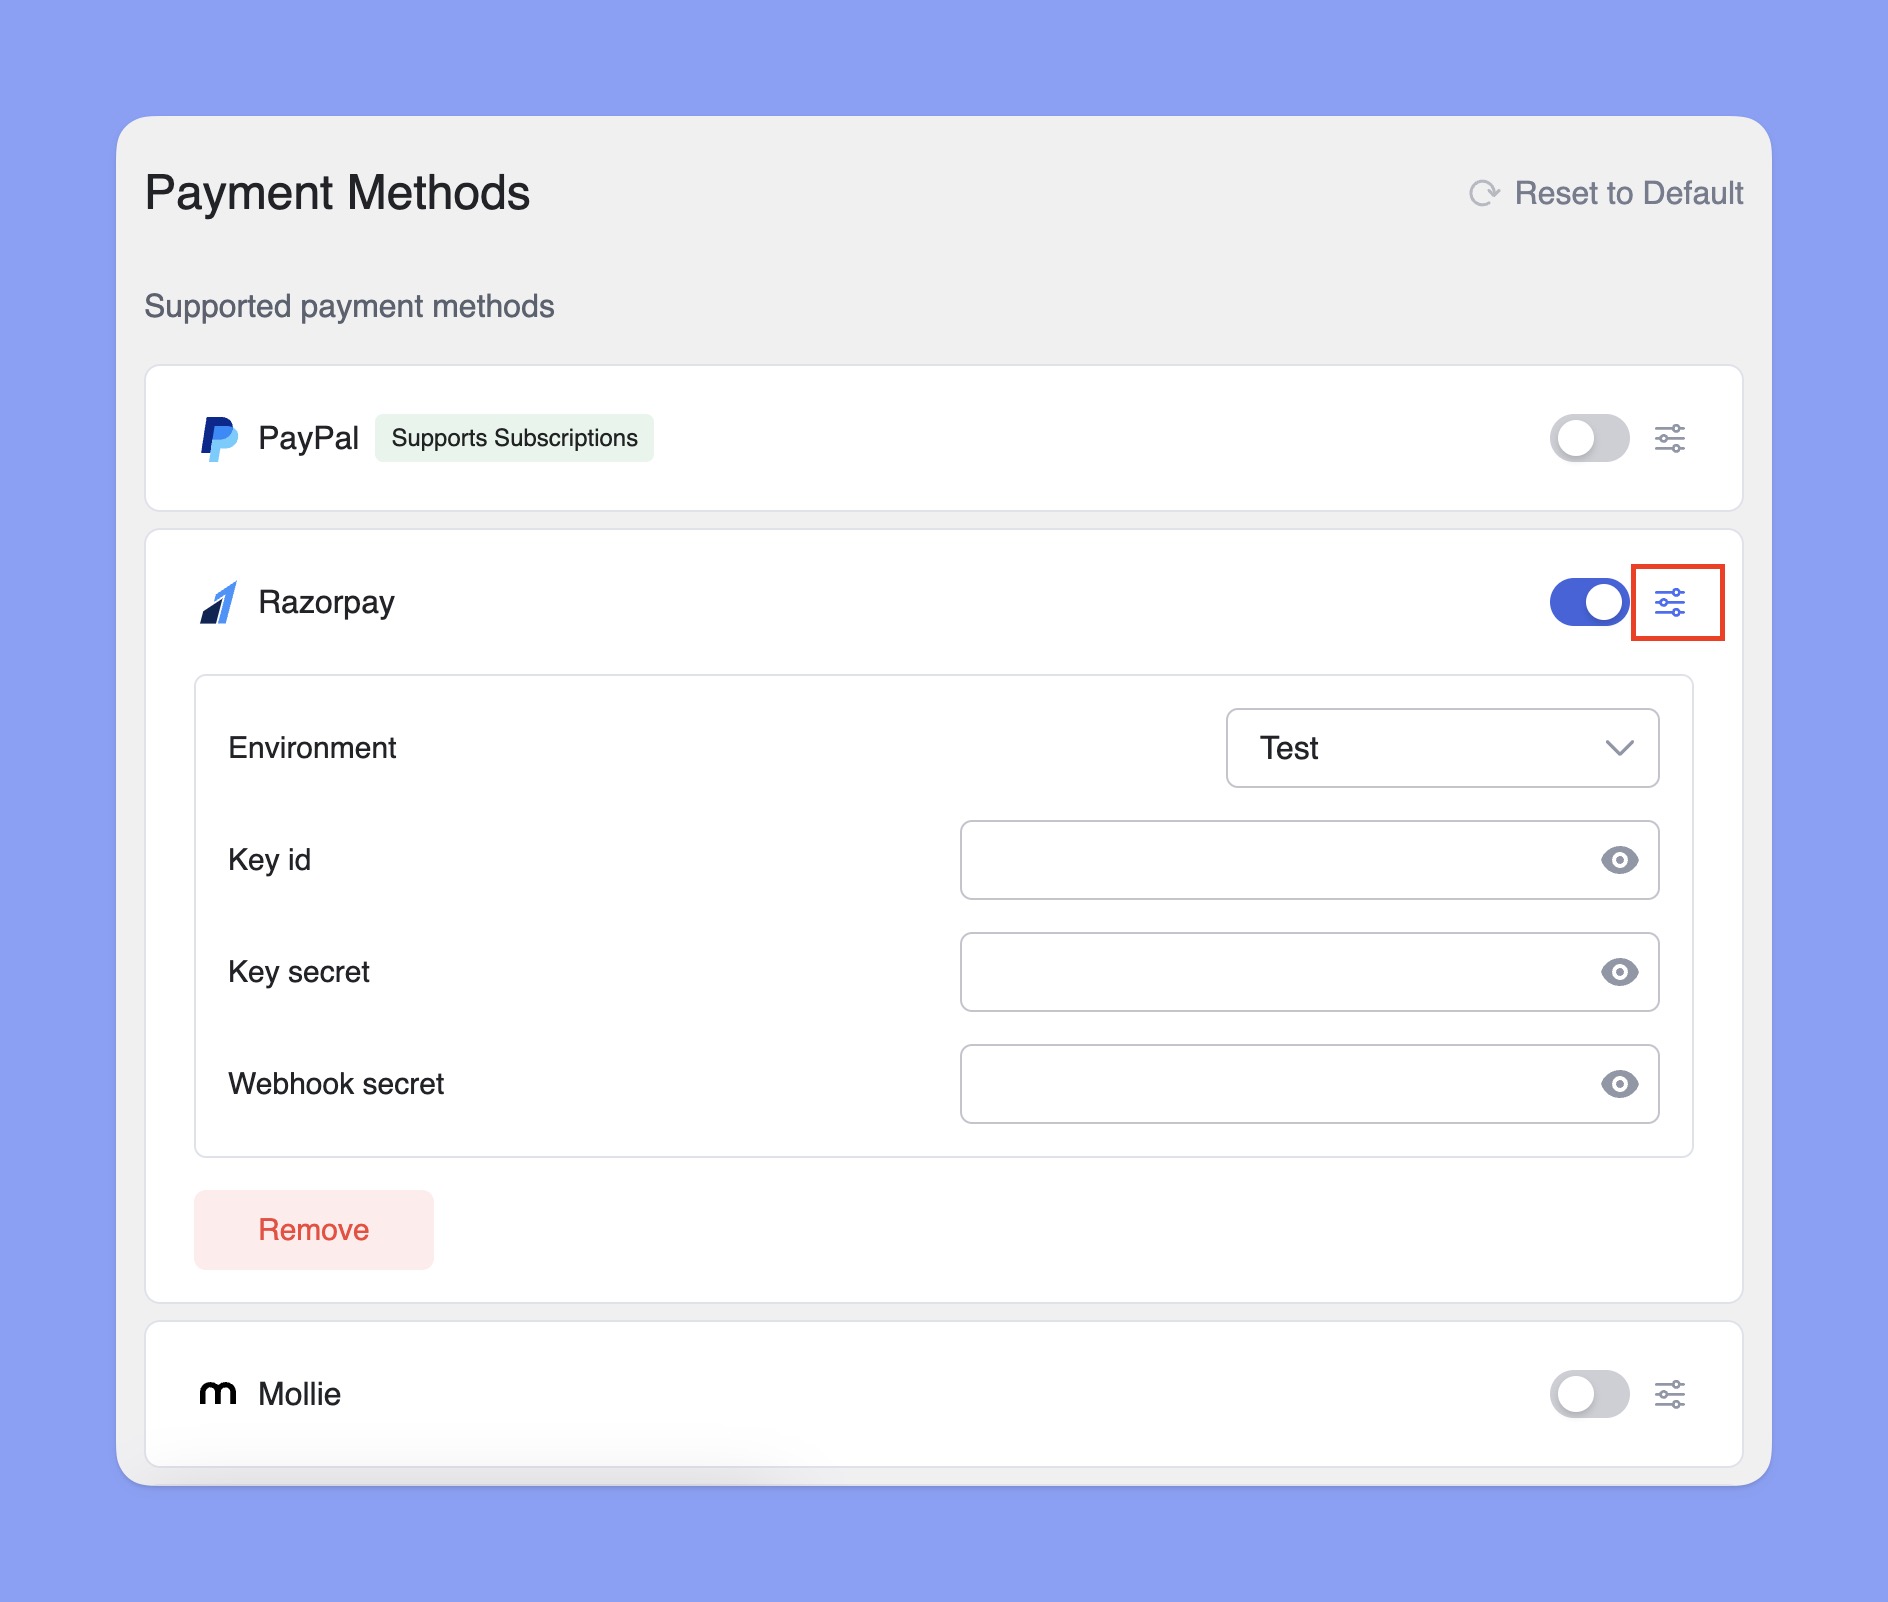
Configuring Razorpay Integration
In the Payment Methods section, toggle the switch to enable Razorpay for checkout. Then, click the Setup icon next to Razorpay to expand the settings. Here, you can select the Environment and enter your Key id and Key secret.
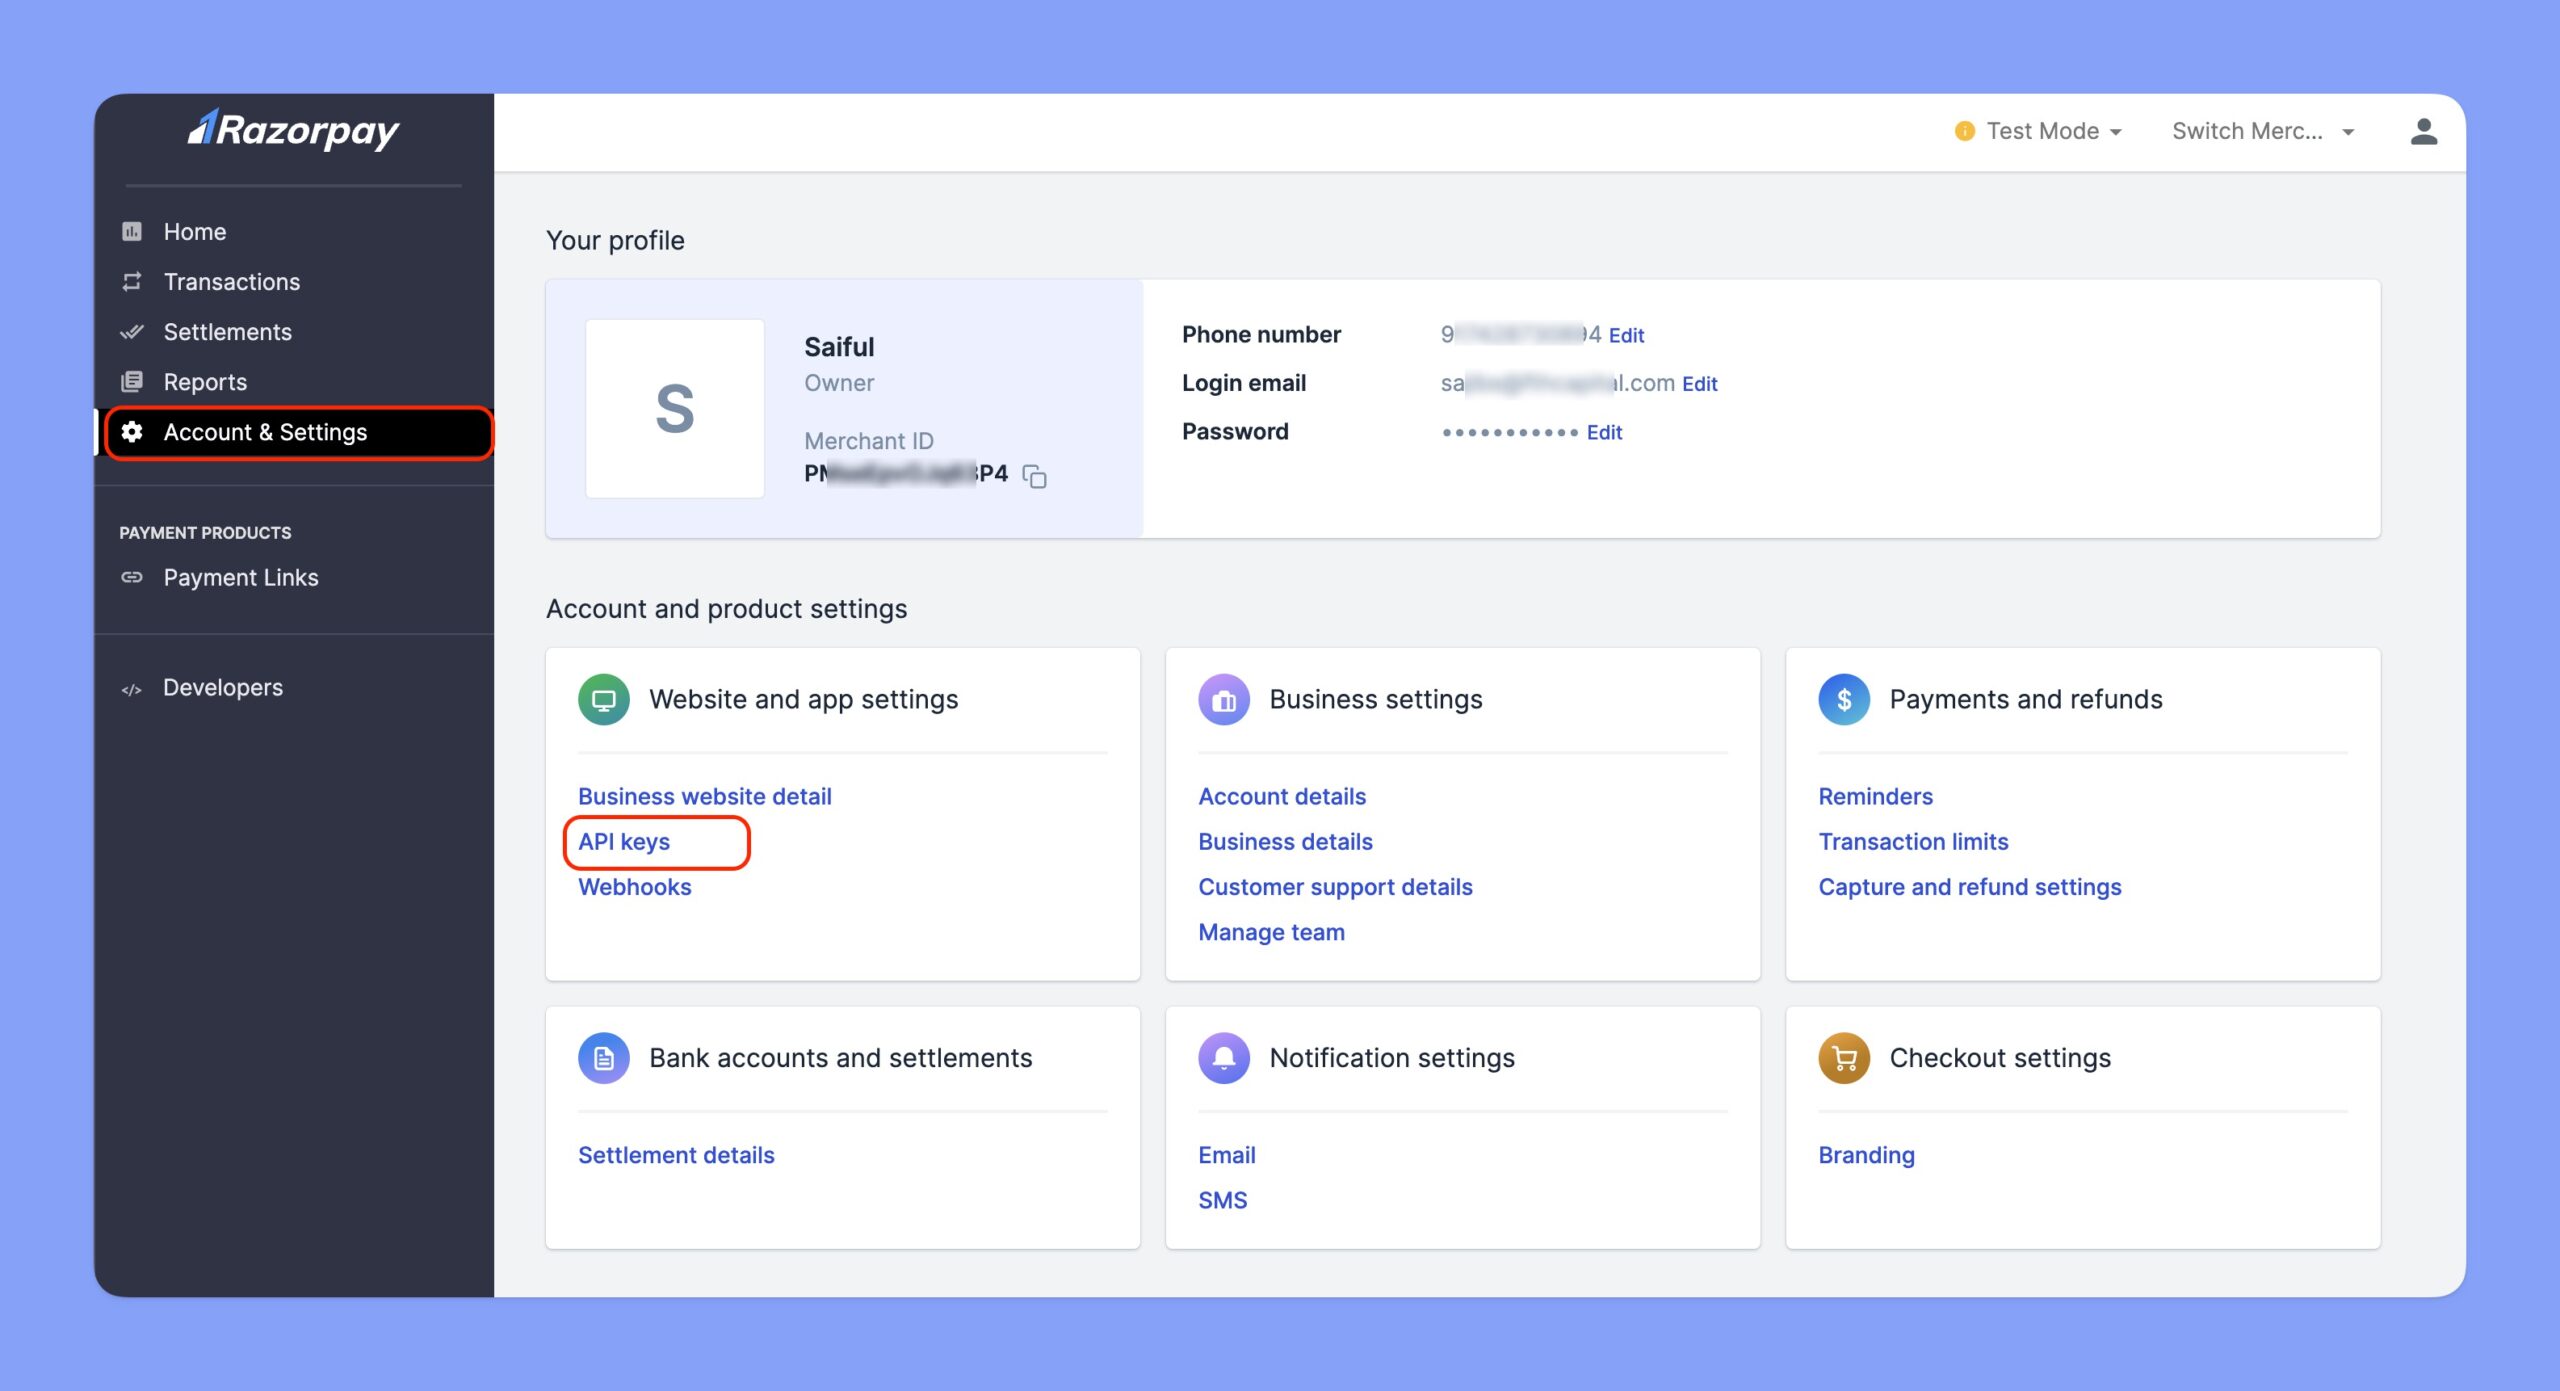
How to get Razorpay’s key ID and key secret?
You’ll need Razorpay’s key ID and key secret to integrate it with Tutor LMS. Here are the steps to get that:
- Login to your Razorpay dashboard.
- Navigate to the Account & Settings tab.
- Select API keys from the Account and product settings section.
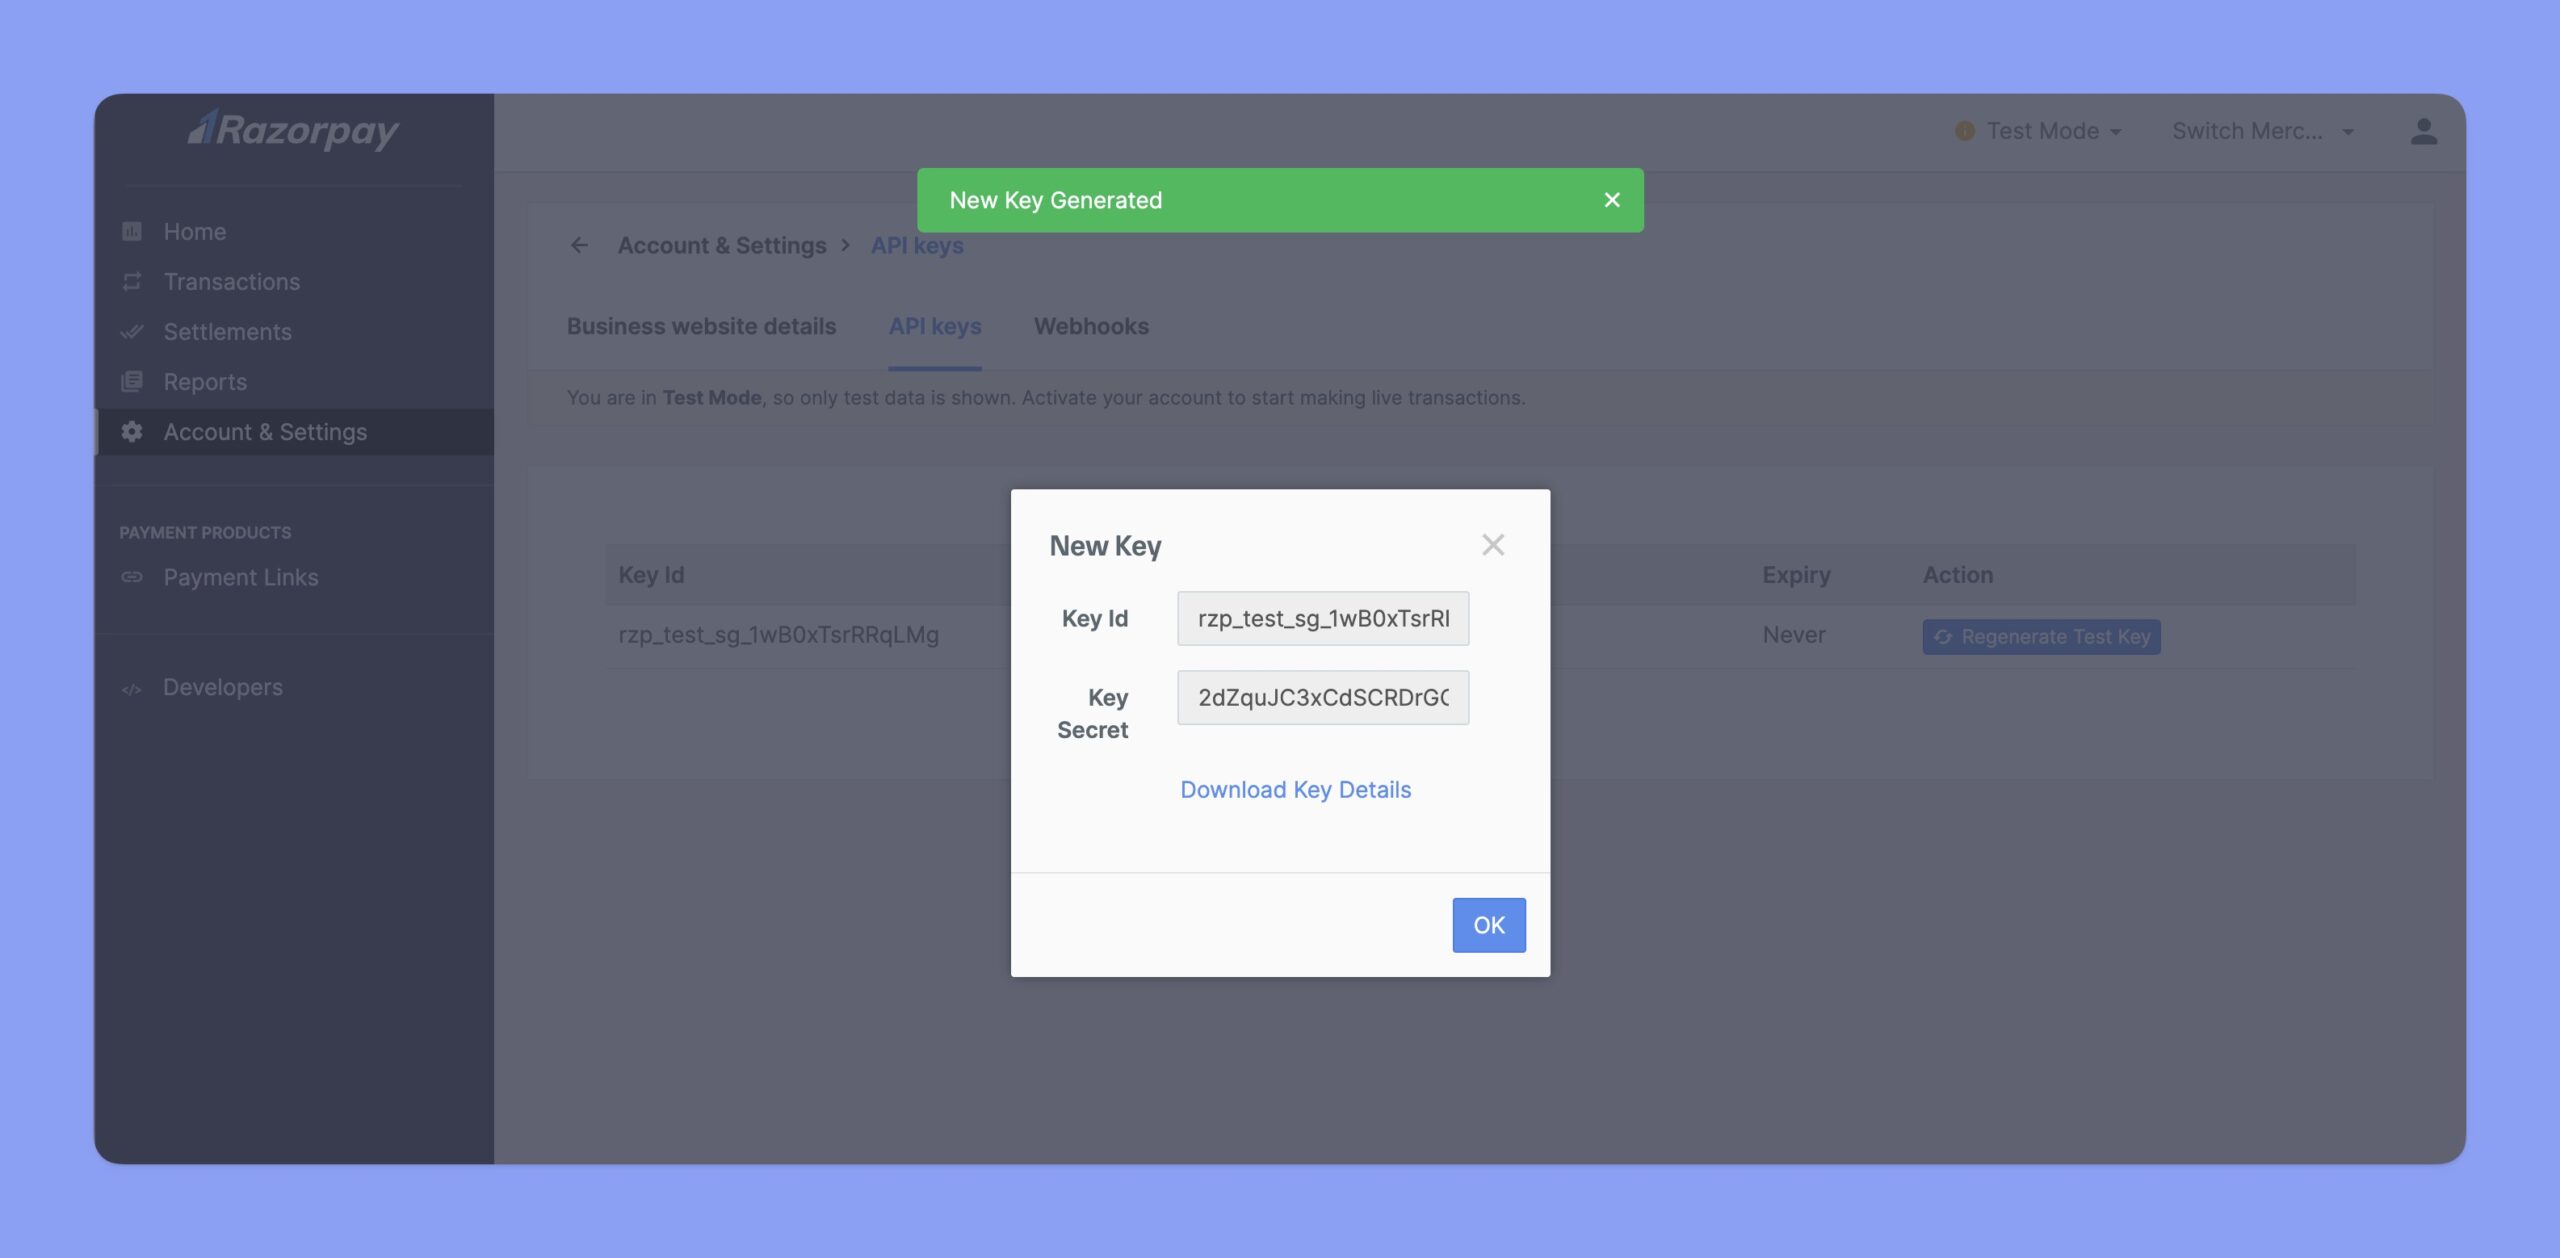
- Click on the Generate Test Key button from the API keys tab.
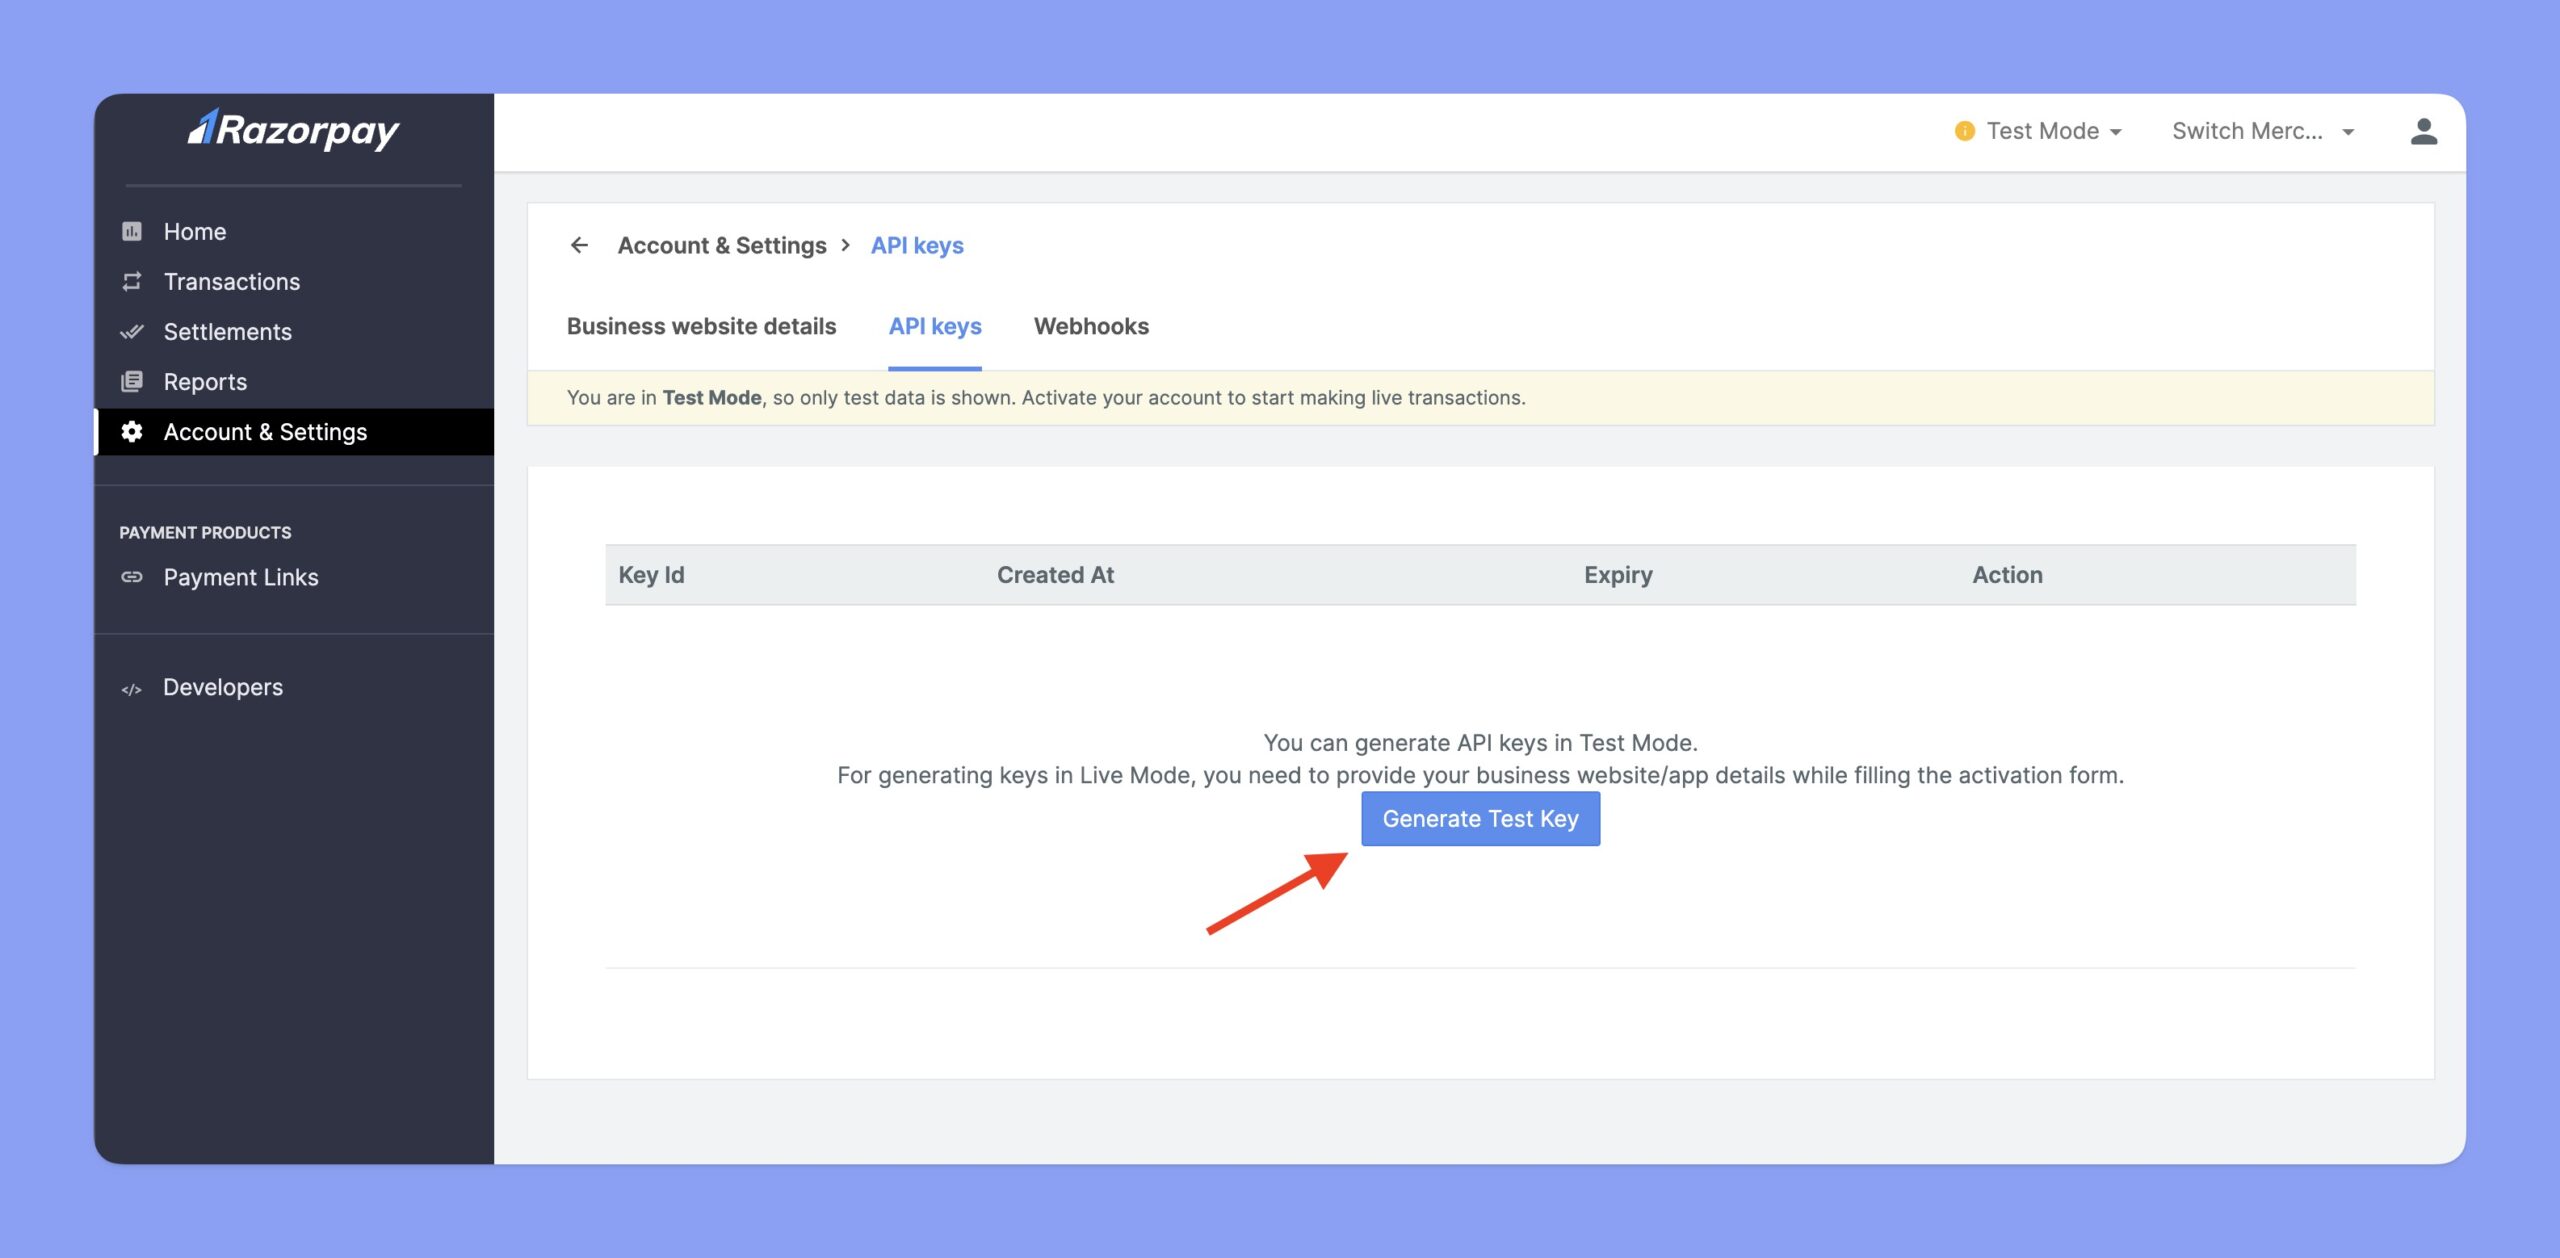
- Download the key details from there. The Key Id and Key Secret will be downloaded in CSV format.
- Lastly, you have to set the webhook on Razorpay. To do so, navigate to the Account & Settings > Webhooks tab.
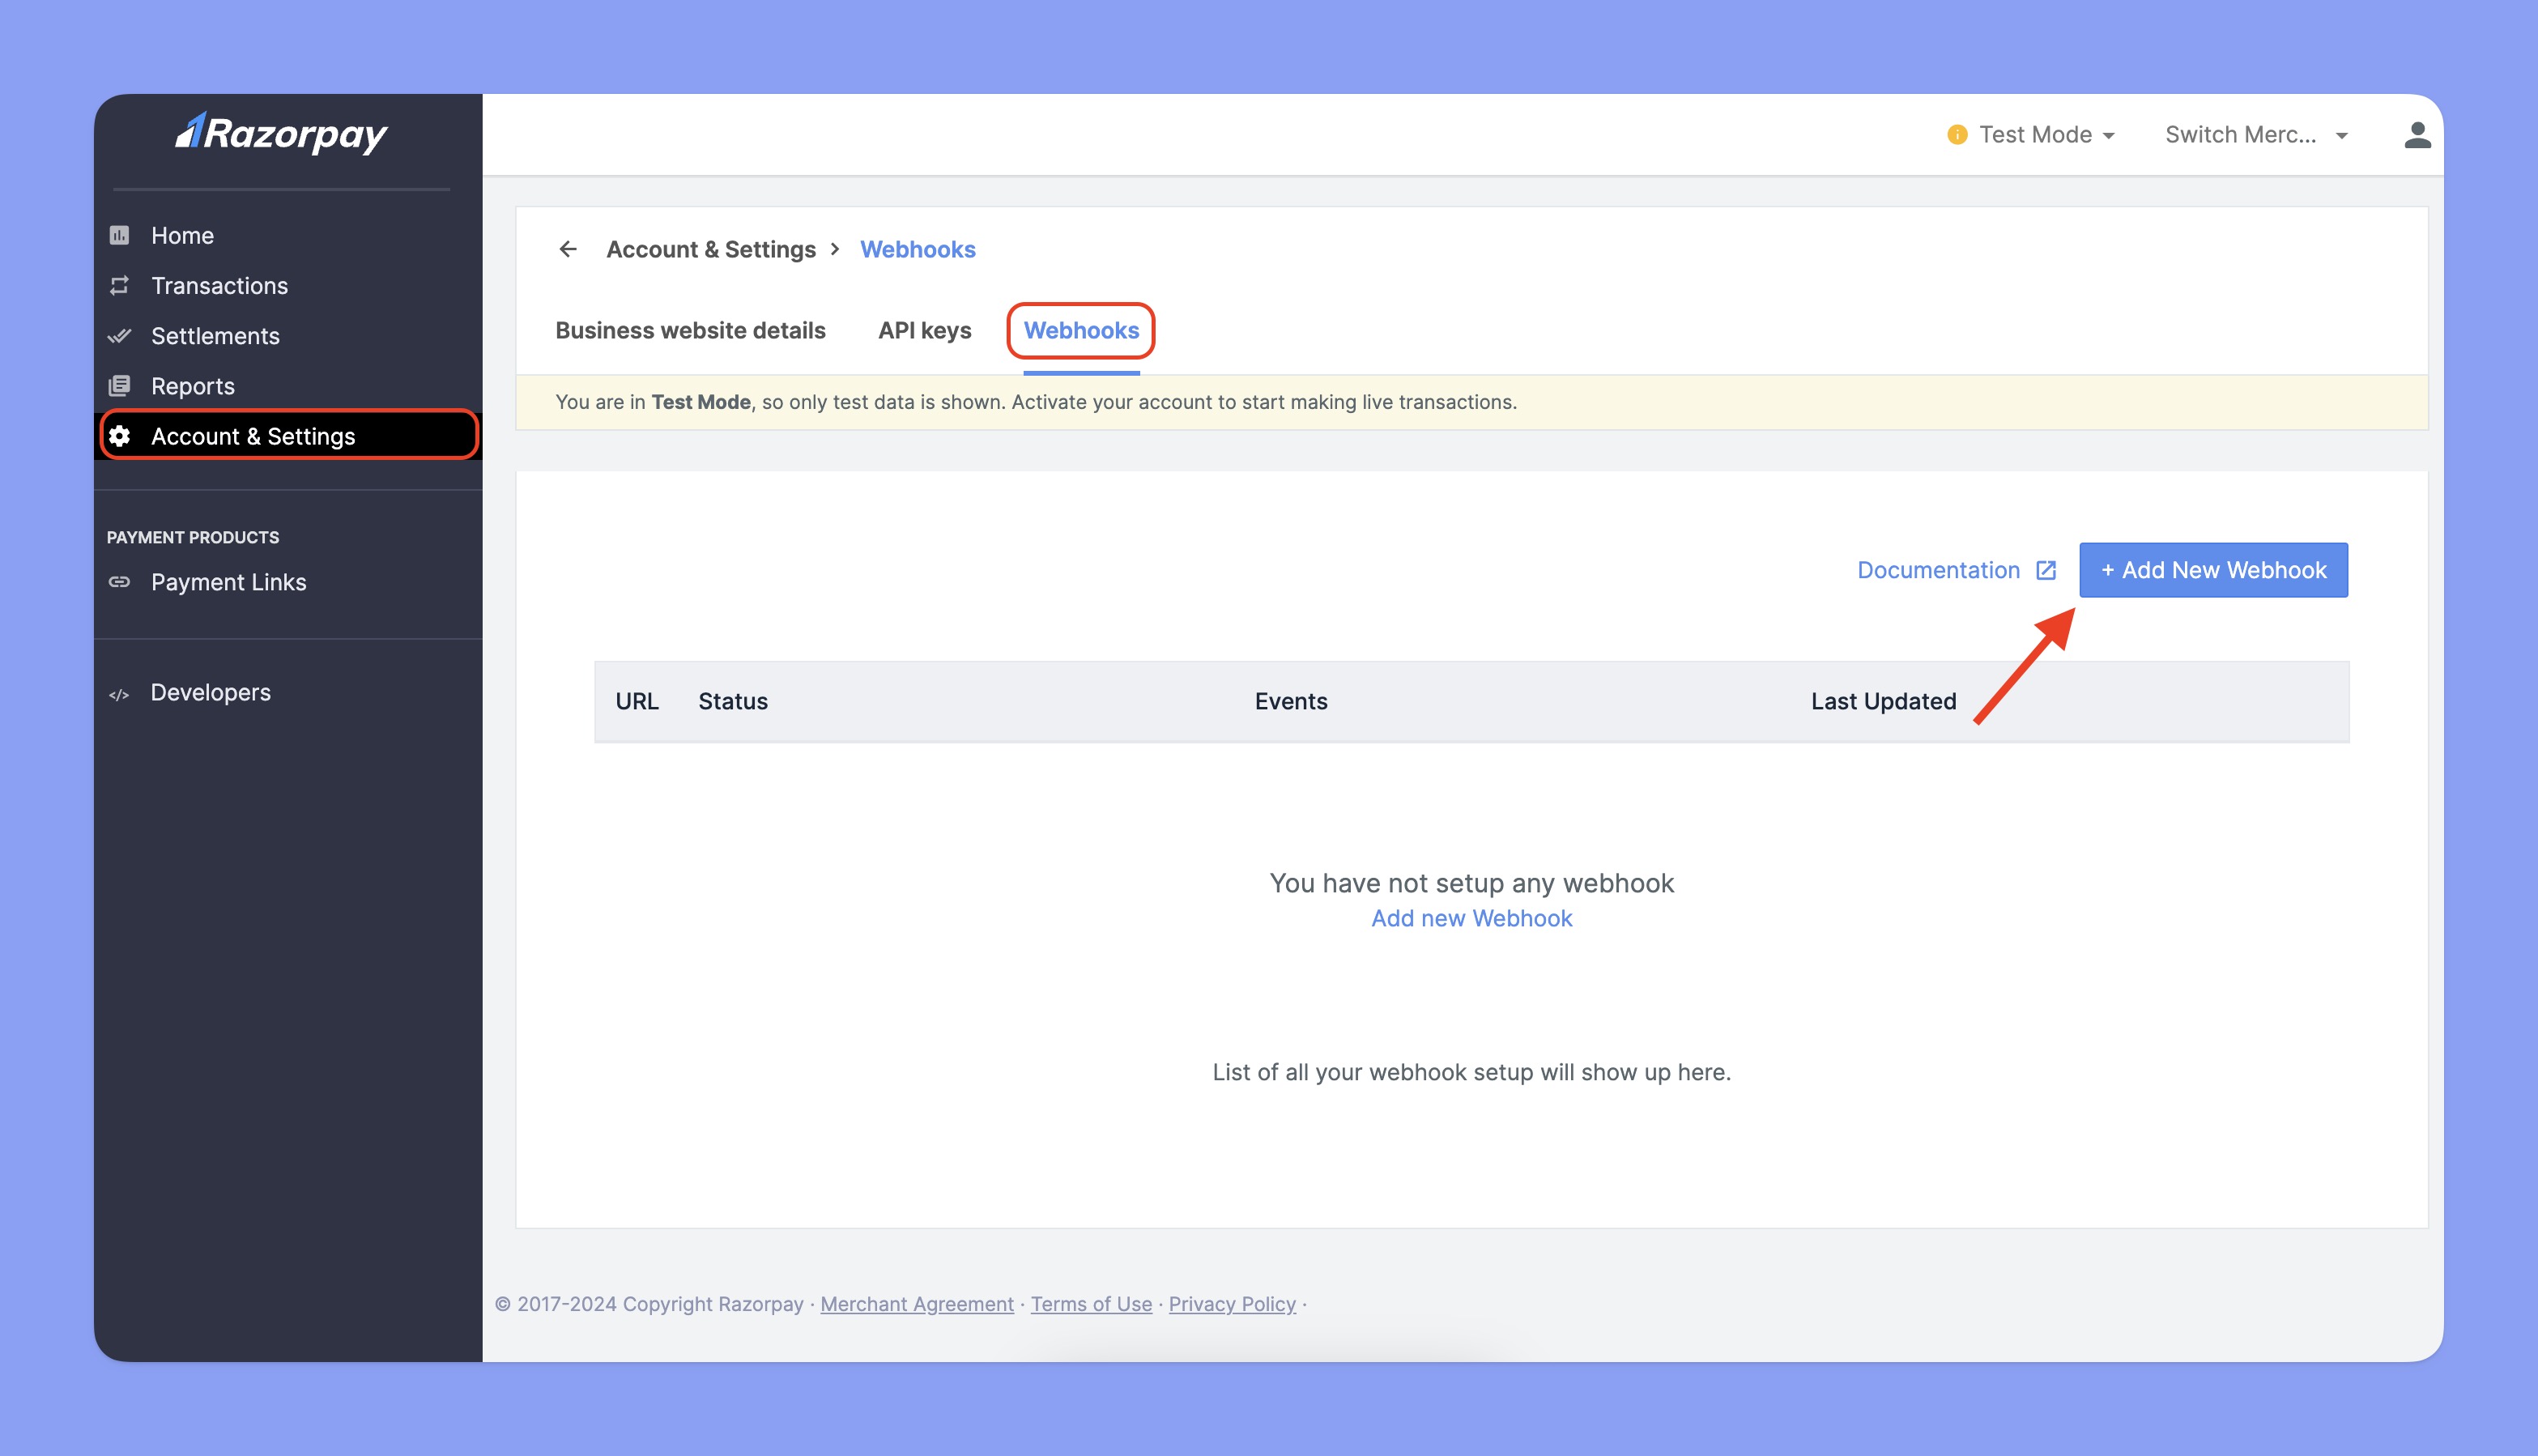
There, click on the Add New Webhook button, and you’ll get the window to setup your webhook.
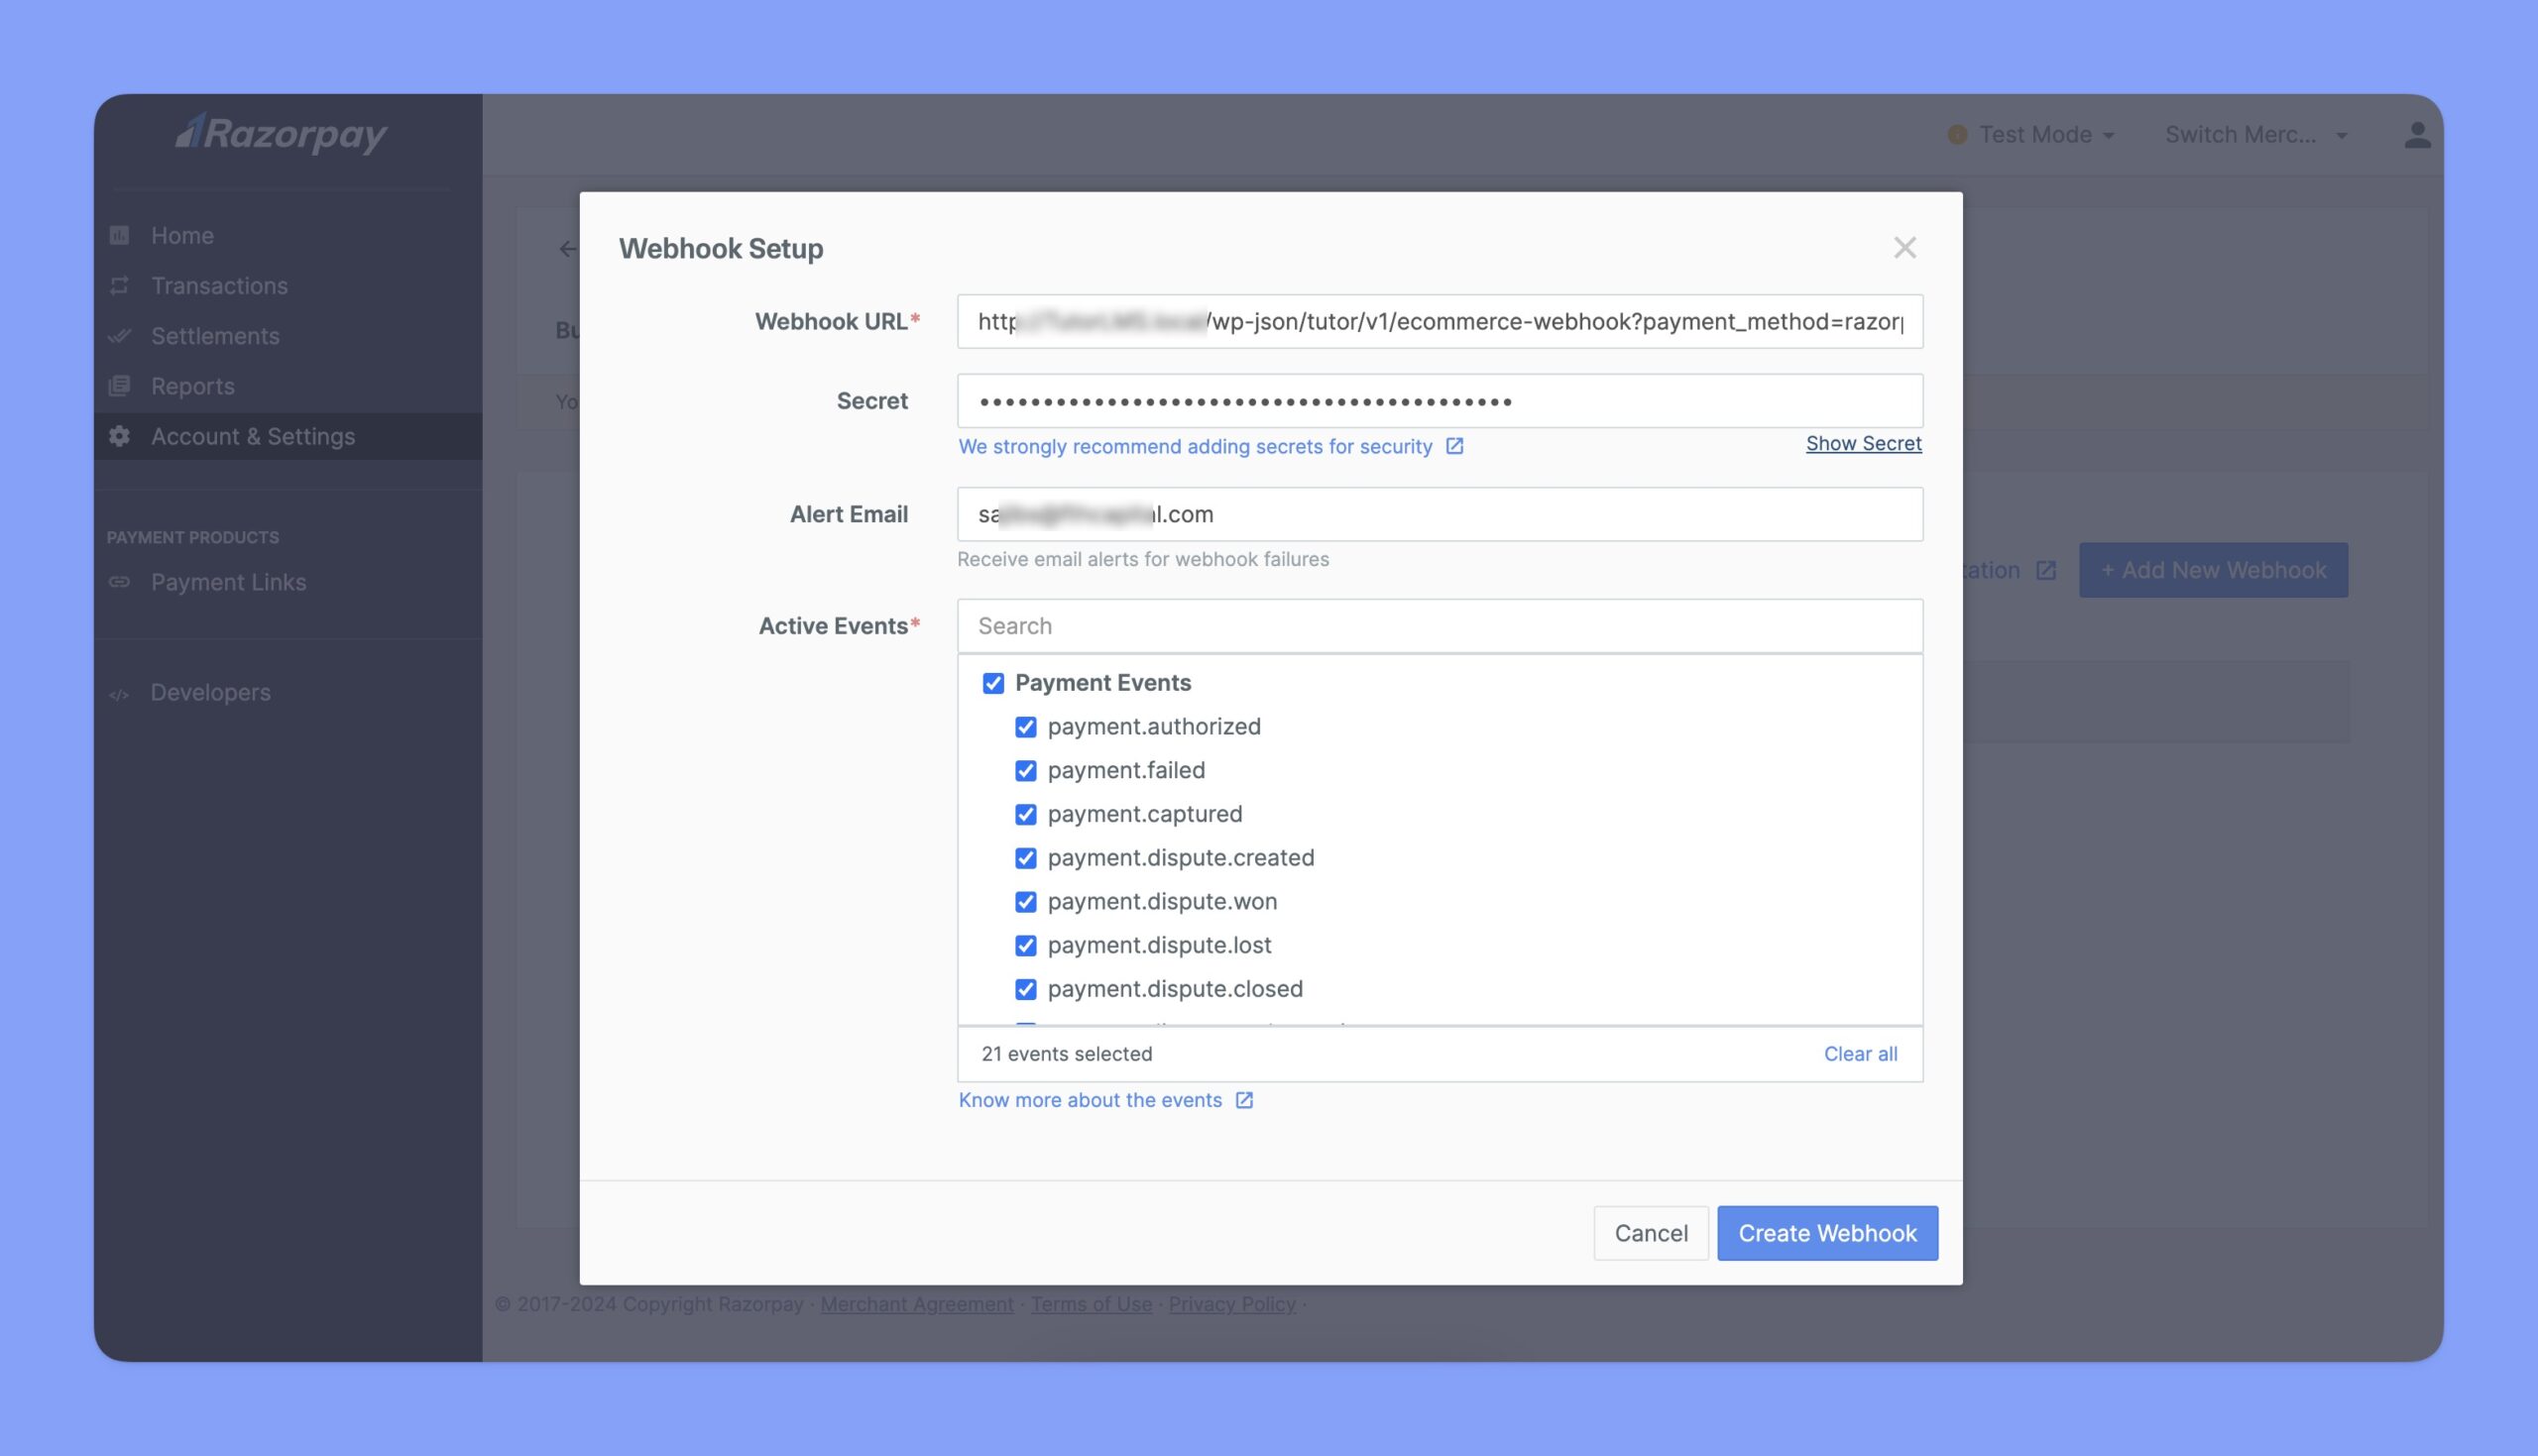
The sample webhook URL is: https://yourdomain.com/wp-json/tutor/v1/ecommerce-webhook?payment_method=razorpay
Configuring Razorpay Settings in Tutor LMS
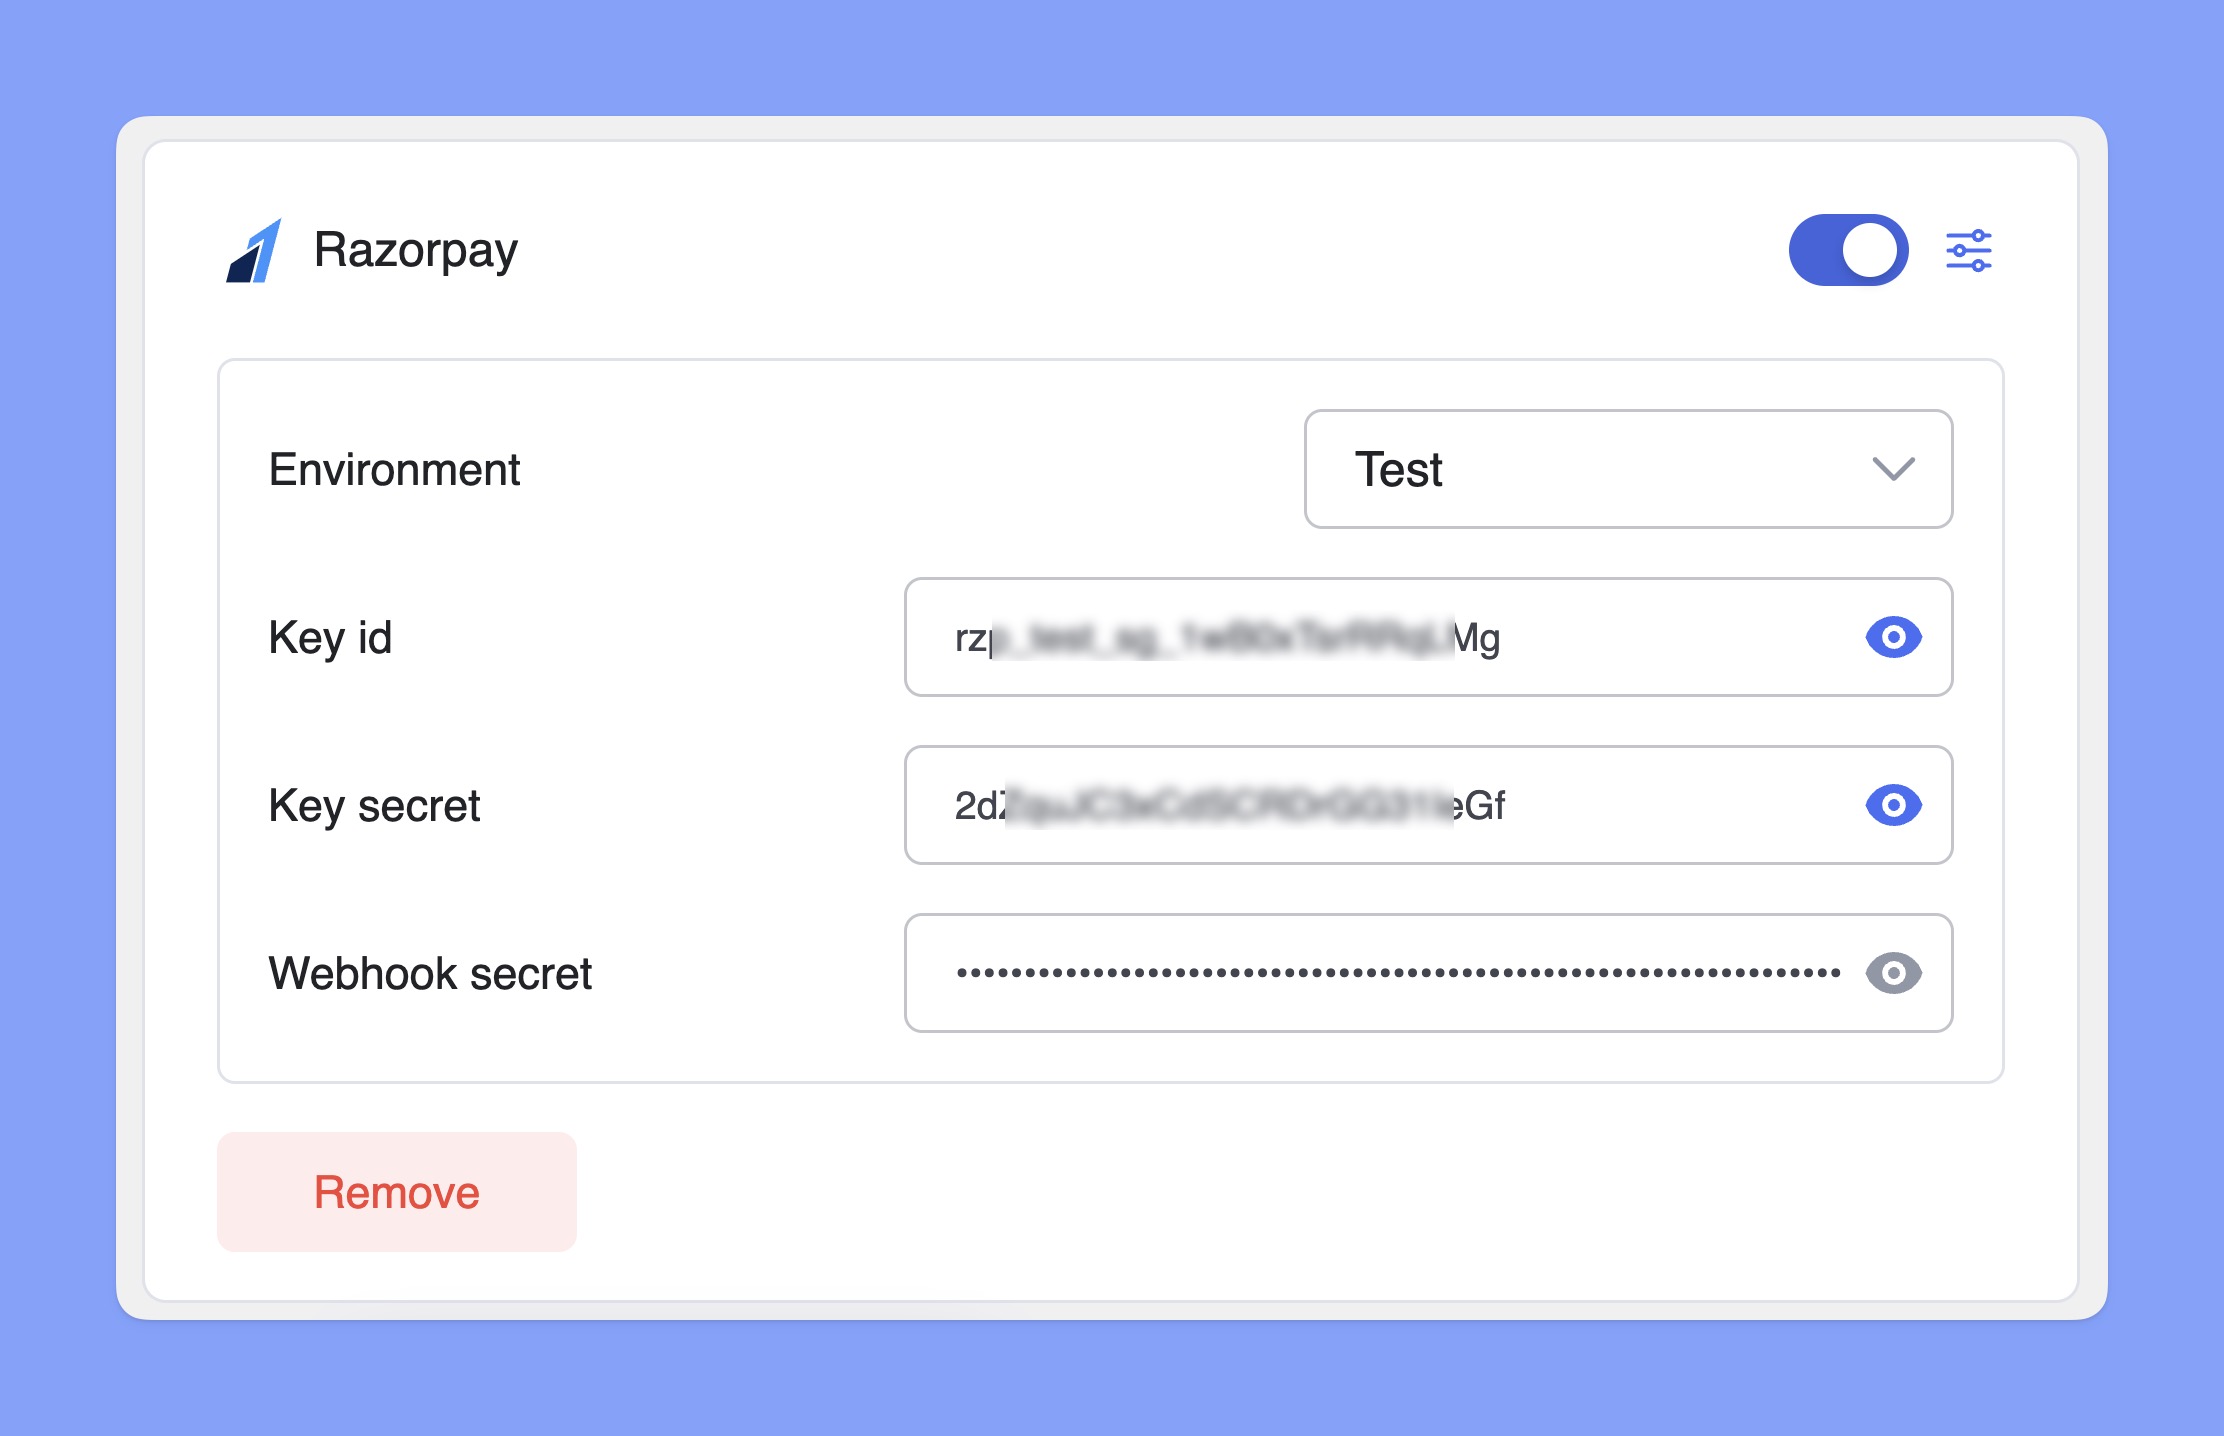
Now, navigate to the Razorpay configuration section and follow the steps below:
- Choose between Test or Live Environment, depending on whether you want to process real transactions or run test payments.
- Paste the Razorpay Key Id, Key Secret, and Webhook secret in the input field.
- Click Save Changes to finalize your Razorpay integration.
That’s how you can seamlessly integrate Razorpay into your Tutor LMS platform and offer diverse payment options to your students.
Additional information
| Validity |
Pre-activated |
|---|
Reviews (0)
Only logged in customers who have purchased this product may leave a review.


Reviews
There are no reviews yet.